Pages

Wednesday, August 17, 2011

Apple Crumble Cake

I've given up on summer here in Ayrshire now and have instead turned my attentions towards Autumn. I mean, its practically September already, right? And with autumn comes many things. The search for the perfect winter coat (a navy slightly higher than mid-thigh duffle, please?), the dusting off of last year's boots to assess the damage and, of course, apple season! I love apples. So versatile and very easy to bake with. So to celebrate the coming season I decided to bake an apple crumble cake.

I first came across this recipe at the beginning of summer but knew it would make more sense at this time of year. I'm not a huge fan of blackberries so I omitted them immediately and then set to work.


Let me tell you, the smell of this cake whilst it was baking was divine. I could barely wait the 50 minutes it required to bake.


Now, I know it looks good already and without a doubt I can vouch for its tastiness alone but if there's something which improves apples, or anything really, its dulce de leche. This soft caramel made from condensed milk just added the extra sweetness I always crave. And does it ever make things fun to look at.


This cake packs a pretty hefty punch so beware the temptation to cut yourself a huge slice! Two small ones is perfectly okay though, right?

Recipe (adapted from Olive Magazine):


200g butter
150g sugar
3 small apples, cored, peeled and sliced
4 medium eggs
250g self-raising flour
150g dulce de leche


Preheat oven to 170c/gas mark 4.


For the crumble, set aside 50g of the butter and sugar and of the flour into a bowl and mix with your fingertips to create a fine crumble.


In a larger bowl, add the eggs, the rest of the sugar and butter together and whisk until light and fluffy. Add in the flour slowly and fold gently until fully incorporated.


Pour mixture into your baking tin and arrange the apples on top before then scattering the crumble over the entire thing. Put in the oven and bake for 50-55 minutes or until golden brown.


Once cooled, drizzle the dulce de leche over the top and serve!


Wednesday, August 10, 2011

Lemon Meringue Pie

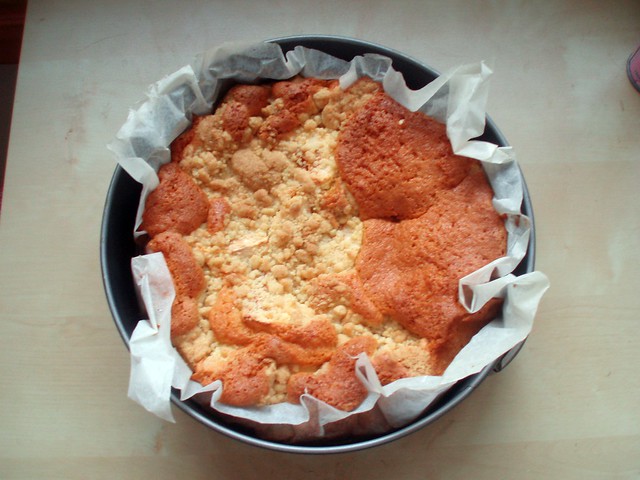
It all started when I bought a pie dish last week in TK Maxx (the home section gets me dizzy). It was ceramic and pastel green and we were obviously meant to be. Once I got home and started to look up recipes to try; the fear set in. I'd never made pastry before, let alone an entire pie from scratch. Cake and I have very frequent dalliances but pies? Totally new territory.

But it turns out I needn't have worried. Thanks to a sweet little recipe courtesy of British Baking by Oliver Peyton (no, I still cannot get enough of that book) I managed just fine. Even without the aid of a food processor, I produced just the kind of buttery, crumbly shortcrust I had hoped for. And I haven't even mentioned the rest yet...


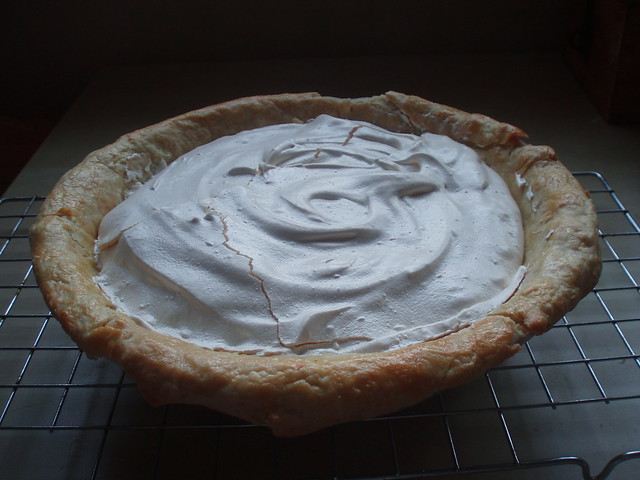
There are a lot of recipes for pies out there but lemon meringue was unanimously voted upon in my house and so I set to work. I had one problem though; my meringue topping cracked in the oven! Anyone have any ideas as to how I stop this happening again?


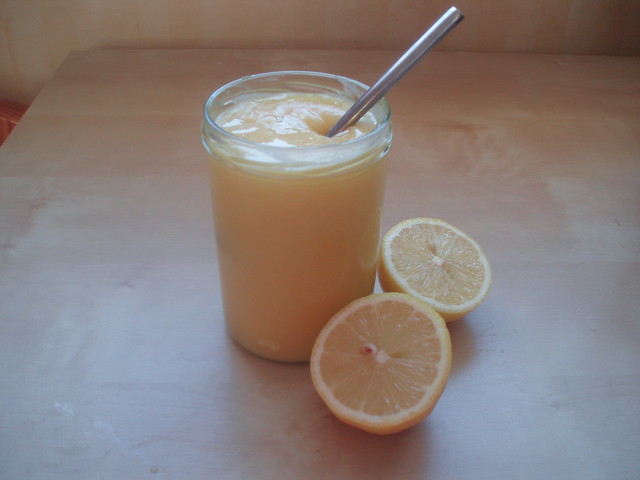
The filling was a sort of quick lemon curd (much quicker than the real lemon curd I made a few posts ago) and was deliciously tart. I doubled the amount of meringue suggested in the recipe as I suspect my pie dish is a little deeper than the one it used and was very pleased with the result. I had never made meringue either so this recipe was full of firsts and risks of disaster but despite the cracking on top, the meringue was both fluffy on the inside and crispy on the outside. I was very pleased!

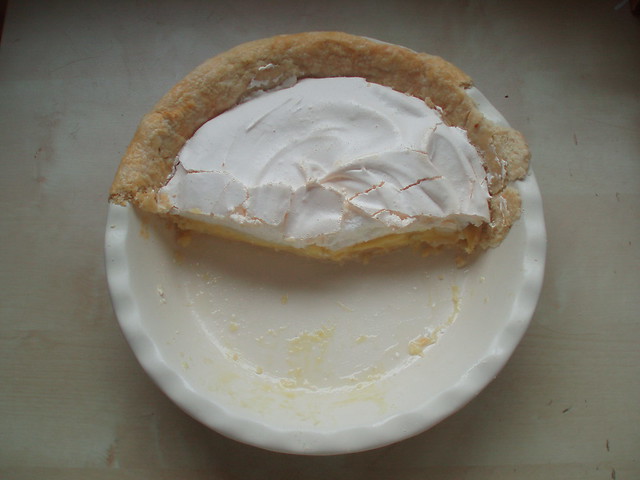
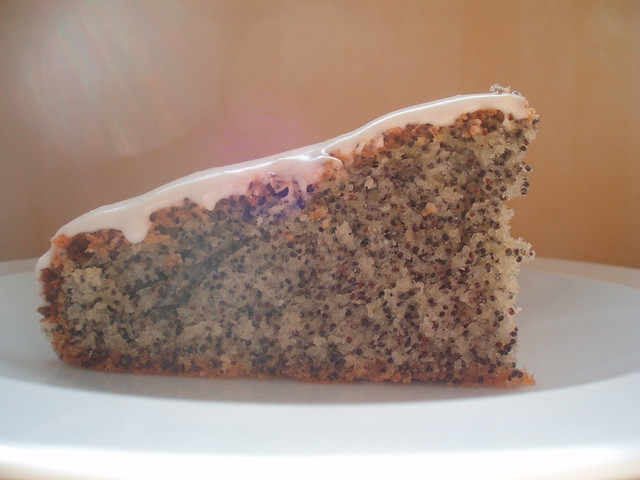
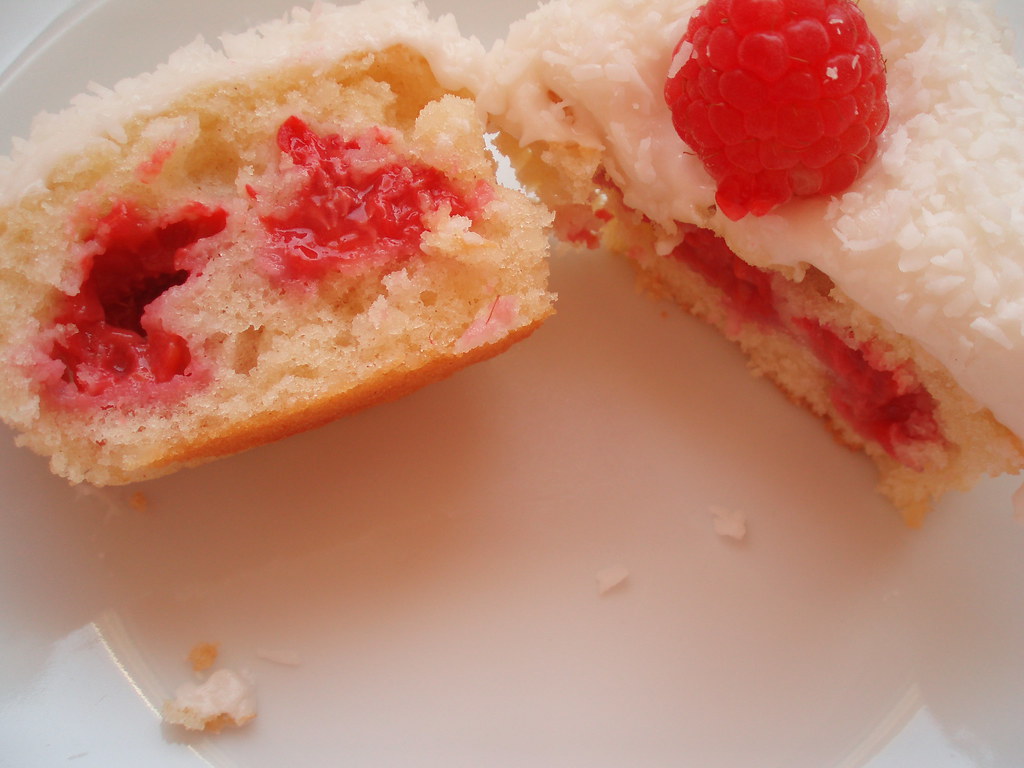
Unfortunately, when I baked last night I started a little later than normal and the sun went down before I could get some pictures of the inside. So when it came to doing it this morning, this was all that was left:


A sure sign that it was a hit! Speaking now, around 24 hours after it cooled off, there is not a crumb left.


Recipe (adapted from British Baking by Oliver Peyton):


For the pastry:


220g plain flour
pinch of salt
100g unsalted butter cut into cubes
2 tbsp cold water


Sift flour and salt together before adding the butter. use the back of a fork to work the butter into the flour mixture until it resembles a course sand. Add the water and then find with your fingertips. Mould into a ball before covering with clingfilm and chilling for at least 30 minutes.


After chilling, roll the dough out big enough to cover your pie dish and drape over the it. Cut off any excess and cover with tin foil. Drop baking weights or beads onto the foil and place in the oven for ten minutes at 180c/gas mark 4.


After ten minutes, remove from the oven and take off the weights and foil. Place the dish back in the oven , uncovered, for another ten minutes.


Allow to cool.


For the filling:


50g sugar
5 tbsp cold water plus 200ml
3 tbsp cornflour
zest and juice of 2 large lemons
2 egg yolks
45g butter cut into cubes


Turn oven down to 150c/gas mark 2.


Combine sugar and cornflour in a bowl and add the 5 tbsp water. Mix well. In a pan, combine the 200ml water and the lemon zest and heat until almost boiling. Now whisk in the cornflour mixture. Once combined, remove from the heat and add the eggs, lemon juice and the butter before returning to the heat. Stir continuously until thickened, never letting the mixture boil. Pour filling into pie case.


For the meringue:


4 egg whites
230g sugar


Whisk egg whites until light and fluffy then slowly add the sugar until the mixture becomes thick, stiff and glossy.


Spread meringue over the filling and bake for 40 minutes or until the meringue is golden.


Friday, August 5, 2011

White chocolate, peanut butter and coconut brownies


I was doing my usual blog reading on Wednesday evening when I came across this recipe by the wonderful Brown Eyed Baker. It details a recipe she adapted from regular brownies into white chocolate and coconut ones. To be frank, they looked amazing and I was completely inspired to recreate them for myself. However there was something missing for me and that thing was peanut butter. I could go on for days about my obsessive love of peanut butter and its many uses but I'll be kind and spare you. This time that is. So here is my experience with adapting this already amazing recipe.


I picked up this white chocolate because, well, the packaging is pretty. Really pretty. And I was excited to open it up and see if the prettiness continued on the inside, but I was to be disappointed. This particular brand is made by Nestle and it was printed all over it once I opened it up. I normally avoid Nestle products wherever possible but I got carried away this time sadly and didn't full inspect the packaging.  Nevertheless, it was particularly delicious so I pressed ahead.

To incorporate the peanut butter I just decided to cut down a little on the amount of white chocolate used and it appeared to work fine. There's probably a more scientific way to go about it, but science and I parted ways around the age of 16 never to be seen together again.


Let me tell you, not eating the mixture straight out the bowl almost killed me. The recipe probably would have yielded more had my spoon not somehow ended up in there a few (many) times...

The end result was a very moist, rich and buttery brownie with a hint of coconut that is definitely making it onto my list of go-to bakes. The addition of peanut butter made it extra special for me but it would no doubt taste just as good without it. But until I can learn to live without it, I'll never know...


Recipe (adapted from Brown Eyed Baker):


150g flour
1 tsp salt
240g white chocolate
60g peanut butter
225g butter
340g caster sugar
115g light brown sugar
5 eggs
1 tsp vanilla
100g shredded coconut


Preheat oven to 170c and line a brownie tin with parchment paper.


Whisk flour and salt together in one bowl and set aside.


Put chocolate, peanut butter and butter into another bowl and set on top of a pot of boiling water. Stir until all ingredients have melted and combined.


Remove from the heat and add in the sugars, whisk until combined. Next, add 3 of the eggs and vanilla and whisk lightly. Add the remaining eggs and whisk again but be careful not to over beat.


Mix in the flour and salt and fold until just combined. Pour into the prepared tray and bake for around 30-35 minutes or until a toothpick comes out with only a few crumbs attached.


Tuesday, August 2, 2011

Scottish tablet cupcakes

Looking at my 'things to bake' list yesterday I realised something - they all contained fruit. A very summery list and yesterday was not very summery at all here in Ayrshire. So I turned my attention to an experiment I'd been meaning to have for quite some time now; tablet cupcakes.

For those of you unfamiliar with tablet (poor souls!), it is basically a crumblier, more buttery fudge. No chewing required as it melts in the mouth.


It is something I have grown up with and is traditionally handed out to kids at Halloween and is more often than not homemade. So I have something to confess! I bought this tablet. I know, shameful. But I justify it because this recipe was an experiment and making tablet can be time consuming, messy and I don't have a method which makes less than about oh... 50 squares?! But yes, terrible.

Anyway, I pared the tablet with a vanilla cake as tablet is incredibly sweet and doesn't need a competing flavour. For the frosting I ground up one bar of the tablet into a regular buttercream recipe and then added little chunks and mixed in lightly just before I frosted the cakes themselves. The result was an very sweet treat. One per person seems to be the limit before a sugar coma hits.


Also, I have a Twitter page and I would love more bakers/cake eaters to follow!


Wednesday, July 27, 2011

Lemon curd and strawberry buttermilk scones

Its the end of July and summer has finally decided to show its face here in Scotland. I've been spending my days off on the beach, eating ice cream and... making lemon curd and scones. Not even this weather can deter me when i get an idea in my head!


I made the lemon curd at the weekend after I accidentally came home with a rather large bag of lemons...

It came out beautifully though I'd never made it before and despite a brief spell where I was sure I was going to end up with lemon syrup instead of curd. Very rich, sweet and buttery.


And here's the recipe:

225g sugar
Zest and juice of 3 lemons
5 egg yolks
300g cold unsalted butter, cut into cubes


Makes 550g of curd.


Put sugar, zest, juice and egg yolks into a heatproof bowl and set above a pan of just simmering water. Stir constantly for ten minutes. Start adding the butter a few cubes at a time until its all incorporated. At this point, the curd should have thickened to a creamy consistency. Don't overheat or the eggs will scramble! 


Strain through a sieve to get rid of the zest and spoon into your jars before sealing tightly.


Just a note on the recipe here, the cooking time was estimated at 15 minutes but it took my curd around 25 minutes to thicken up so don't give up hope too soon!


And of course i couldn't resist making something to put the curd on. I originally thought of sultana scones but with Scottish strawberries being in season it seemed rude not to make strawberry scones instead! These ones were made with buttermilk, something I've never used in a scone recipe before. The finished product wasn't as sweet as I would have liked but with a generous smear of lemon curd they were just right and they counteracted the intense sweet citrus of the curd well.


240g self-raising flour
2 tsp baking powder
40g sugar
pinch of salt
60g cold butter, cubed
175ml buttermilk
100g strawberries
1 egg yolk for brushing


makes 8.


Preheat oven to 170c/gas mark 3 and line a tray with baking paper.


Sift flour and put in a bowl with the sugar and baking powder. Add the butter and mix with your fingers or a fork until it takes on the consistency of rough sand. Add the buttermilk and mix well before adding the strawberries.


Roll out the dough onto your work surface, sprinkling with flour to stop it sticking until it is roughly a few centimetres thick and then cut into circles. Brush over the egg yolk and place on the baking tray. Bake for 20-25 minutes or until golden brown and cooked through.


Right, I'm back off outside to enjoy the sunshine before it disappears again!

Friday, July 22, 2011

Poppy seed and cream cheese


This is a Rachel Allen recipe which I slightly adapted to satisfy a cream cheese craving I woke up with this morning. Am I the only one who walks around with blinkers on until I get what it is I crave?


One thing to note is with this recipe is when it asks you to create a shallow well in the centre of the cake tin before putting it into the oven; listen to those words! The well I created was a little too shallow which meant it peaked slightly.


Luckily of course the flavour isn't dented by my mistake and it was really, really delicious. The cake itself is  quite rich and moist. The original recipe called for a vanilla buttercream icing but I found the replacement of cream cheese icing complemented the cake very well. That said, a liberal coat of icing is probably ideal if you don't want to overwhelm tasters. Unless that taster is me, in which case, more is definitely more!


100g plain flour
150g unsalted butter
100g caster sugar
3 eggs, beaten
1 tsp baking powder
75g poppy seeds


Preheat oven to 170c/gas mark 3. Butter and line 20cm/8in cake tin.


Cream butter and sugar together before slowly adding in the eggs until fully incorporated. Sift the flour and baking powder and add them to your mixture. Finally, add the poppy seeds and stir until combined.


Spoon mixture into the cake tin and make a shallow well in the centre of the tin. Bake for 25-28 minutes or until cooked through.

Saturday, July 16, 2011

Raspberry and coconut weekends

This recipe was one I had bookmarked upon my first flick through British Baking written by Oliver Peyton of Peyton and Byrne. The book itself probably deserves its own post purely because of its amazing design. It is packed full of traditional British recipes and a few 'trendier' ones too, all bound together by lilac hardcovers. Notably the book does not feature the word 'cupcake' and instead reaches for that more traditional term 'fairy cake' to describe the little cakes. It was refreshing to read to say the least! It was this that spurred me on to actually make the raspberry and coconut cakes for myself.

I have to say, they came out perfectly. The tart raspberries melted into the cake and helped to balance out the sweetness of the coconut icing. A huge hit in my house last night and several requests from friends for deliveries!


If there are any left by this evening I'll be sneaking these in to the cinema when I see Harry Potter. I might be the only person who hasn't been yet!

100g unsalted butter
125g sugar
2 eggs
150g self-raising flour
30g desiccated coconut
60g natural yoghurt
200g raspberries


Preheat oven to 170c.


Cream sugar and butter together until fluffy then add the eggs one at a time. Sift the flour in alongside the coconut and yoghurt and mix until incorporated. Place two raspberries in each case and then fill with the batter. Bake for 15 minutes.


There was a recipe included in the book for the frosting but I chose not to follow it... oops. So I'm afraid I don't have an exact recipe for what I did other than to say I incorporated coconut milk and lessened the amount of butter into an otherwise standard buttercream recipe.

Friday, July 15, 2011

Keeping it simple

So what started off as a beautiful, sunny morning here in Ayrshire by afternoon had become a bit of a disappointment in the form of rain. I started work at 6am (who said working in a bakery was glamourous?) having seen the sun, I intented to make something light and meringue based tonight but when I left with an umbrella later on, cookies seemed like a far more suitable treat. And while I love to invent different cookie combinations as much as the next person, for me the classic chocolate chip cookie always hits the spot.


Fighting the urge to eat the cookie dough is something I'm still working on!

I made these cookies not too long ago but put them in our oven for fifteen minutes forgetting that it has a fan so they turned out crispy rather than chewy; which is my preferred cookie texture. This time I was a wee bit smarter and put them in for twelve minutes and the results were vastly improved.


The most obvious choice to pair these cookies is with is of course milk or a hot drink but if the weather does decide to perk up, a lemonade or maybe even an ice cold gin and tonic...?

170g plain flour
80g caster sugar
90g demerara sugar
140g salted butter
2 eggs
3/4 tsp bicarbonate of soda
1/4 tsp vanilla
As much chocolate as you wish!

Preheat oven to 180c.

Beat butter and sugars together, then add the eggs until well mixed in. Next, add in the sifted flour and bicarbonate of soda, vanilla and chocolate chips and mix to form the dough. Roll into 2-3 inch round balls and place on two trays. Bake for 12-15 minutes.